Mnoho uživatelů narazilo na problém, kdy Steam nedokáže stáhnout vaši chvíli. Vyzývá, že servery obsahu nejsou ke stažení dostupné. Lze s jistotou říci, že tento problém není způsoben žádným konkrétním problémem, zejména z důvodu mnoha konfigurací uživatelů. Uvedli jsme některá z řešení, která zahrnují všechny metody od podpory Steam i od uživatelů.

Řešení 1: Odebrání nastavení serveru proxy
Proxy server se používá v organizacích, kde je omezen otevřený přístup k internetu. Pro sledování sítě a poskytování alternativní brány uživatelům se používá proxy. Nastavení serveru proxy se často stává překážkou, když se Steam pokusí připojit ke svým serverům ke stažení.
Existují dva způsoby, jak deaktivovat proxy v počítači.
Metoda 1: Chrome
- Otevřete prohlížeč Chrome a po otevření klikněte na nabídku Chrome (vpravo nahoře).

- Po rozbalovací nabídce klikněte na Nastavení .

- Po otevření stránky Nastavení zadejte do pole v horní části „ proxy “.

- Z výsledků vyhledávání vyberte výsledek, který říká „ otevřít nastavení serveru proxy “.

- Po otevření nastavení klikněte na „ Nastavení LAN “ na kartě Připojení ve spodní části.

- Zrušte zaškrtnutí řádku „ Automaticky zjistit nastavení “. Uložte změny a ukončete. Restartujte Steam.

Metoda 2: Prostřednictvím nastavení sítě
- Stisknutím tlačítka Windows + R vyvolejte aplikaci Spustit.
- V dialogovém okně zadejte „inetcpl. cpl “.

- Budou otevřeny vlastnosti internetu. Přejděte na kartu Připojení a klikněte na Nastavení LAN.
- Jakmile se dostanete do nastavení LAN, zrušte zaškrtnutí řádku „ Automaticky zjistit nastavení“ . Uložte změny a ukončete a znovu spusťte Steam.
Řešení 2: Zakázání rozšíření Chrome
Někdy mohou rozšíření přítomná v prohlížeči Chrome vytvořit skutečnou překážku. Narušují vaše nastavení sítě, zejména doplněk s názvem „ Ghostery “. Sleduje vaši síť a poskytuje statistiky, kde zanecháte svou digitální stopu. Dokonce vám dává kontrolu nad tím, které weby mají přístup k vašim datům, které nikoli. Před pokračováním ve stahování se doporučuje tyto doplňky z Chromu deaktivovat. Pokud by problém způsobovali oni, vyřešilo by se to.
To nezahrnuje pouze rozšíření Chrome, měli byste deaktivovat JAKÝKOLI program, který souvisí s vaší sítí (monitor dat, VPN atd.). Je lepší zkusit raději než pokračovat v dalších řešeních, která jsou složitější.

Řešení 3: Změna oblasti stahování
Jedna ze základních oprav zahrnuje změnu oblasti stahování.
Systém obsahu Steam je rozdělen do různých oblastí. Klient automaticky detekuje vaši oblast prostřednictvím vaší sítě a nastaví ji jako výchozí. Někdy mohou být servery v určité oblasti přetížené nebo mohou procházet selháním hardwaru. Změna oblasti stahování tedy může vyřešit daný problém. Před pokračováním v dalších řešeních můžete regiony stahování mnohokrát změnit (není to omezeno pouze na jeden pokus).
- Otevřete Steam a v rozevírací nabídce v levém horním rohu okna klikněte na „ Nastavení “.
- Vyberte možnost „ Stahování “ a přejděte na „ Oblast stahování “.
- Vyberte jiné než vlastní regiony a restartujte Steam.

Řešení 4: Odstranění clientregistry.blob
Může se poškodit váš klientský registr Steam a to může být důvod, proč se potýkáte s chybou. Můžeme to zkusit přejmenovat / smazat.
- Úplně ukončete Steam a ukončete všechny úkoly, jak je uvedeno ve výše uvedeném řešení.
- Přejděte do svého adresáře Steam. Výchozí nastavení je C: \ Program Files \ Steam .
- Vyhledejte ' clientregistry.blob' .

- Přejmenujte soubor na ' clientregistryold.blob ' (nebo ho můžete zcela smazat).
- Restartujte Steam a nechte soubor znovu vytvořit.
Doufejme, že váš klient poběží podle očekávání. Pokud to stále nefunguje, postupujte podle níže uvedených kroků.
- Přejděte zpět do svého adresáře Steam.
- Vyhledejte „Steamreporter. exe '.

- Spusťte aplikaci a znovu spusťte Steam.
Řešení 5: Vymazání fronty stahování Steam
Pokud máte ve svém klientu Steam spoustu čekajících stažení, doporučujeme odstranit všechny kromě jednoho a znovu spustit Steam.
- Otevřete klienta Steam na kartě Knihovna .
- Ve spodní části uvidíte možnost, na kterou je možné kliknout a která říká „ Stahování pozastaveno “. Kliknutím na něj se zobrazí všechny možnosti ve frontě.

- Postupně kliknutím na tlačítko, jak je znázorněno na obrázku níže, odeberete položky z fronty.

- Jakmile je odstraníte, klikněte pravým tlačítkem na hry (kromě těch, které si chcete stáhnout jako první), aby se nastavení objevilo. Po otevření nastavení klikněte na tlačítko „ Odinstalovat “.

- Steam vás vyzve k potvrzení vašich akcí. Když se zobrazí výzva, klikněte na Odstranit a restartujte Steam, než se pokusíte znovu stáhnout tuto hru.

Řešení 6: Použití flush config
Můžeme zkusit spustit příkaz flush config pro resetování konfigurace. Postupujte podle následujících pokynů.
- Stisknutím Windows + R vyvolejte aplikaci Spustit.
- Na dialogovém panelu zadejte „ steam: // flushconfig “.

- Stiskněte OK . Steam nyní zobrazí okno s potvrzením vašich akcí. Stiskněte OK a restartujte Steam.

Řešení 7: Spuštění služby Steam v nouzovém režimu se sítí.
Before resorting to more technical methods, you can try running your PC in safe mode (with networking) and try to start the Steam download.
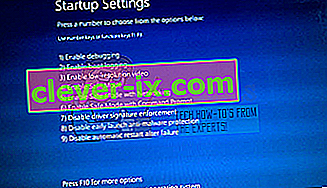
- Get your computer to safe mode by selecting from various options available. Select ‘Enable Safe Mode with Networking’. You can learn how to get your PC to safe mode from here. If you are running Windows 7, press F8 upon the startup of your PC and you will be directed to a similar window where you can select the required option.
- Open Steam and try updating/installing with it again. This method should remove all obstacles (if any) which your Steam may be experiencing.

Solution 8: Disabling Safe-web from router
Your WiFi router may have a setting called safe-web in it. What this does is filter all the incoming data it deems are not trustworthy. It is very common for it to flag Steam as one and disrupts the connection with your computer.
Since there are hundreds of different routers used by the users, it is very difficult to list the solution on how to disable the option for every one of them. Here are some guidelines so you can have an idea.
- Web Safe can be found in the parental control section on the WiFi router configuration.
- It can also be found on the Virus section or the Filtering section.
- To enter your router settings, type the IP which is associated with it (for example for some it is 192.168.1.1). You can check the required IP either by calling your modem provider or by looking at the back of the device ( even its packaging box may have details).
Solution 9: Disabling Anti-virus and Defender/firewall
Before proceeding to reinstall Steam, we can try meddling with the antivirus. Antivirus monitors each packet of your computer sends and receives. Although Steam has collaborated with most of them so they don’t give problems, sometimes they do. The solution is to disable/uninstall them and check if you are able to download then.
McAfee Antivirus:
McAfee has no way to exclude certain files from its real time scanning. The only way is to disable the antivirus entirely until the game is updated. To do this, open McAfree and select “Virus and Spyware Protection”. Here you find the option of “Real-Time Scanning”. Click that option and turn it off.

Then follow the following instruction to verify integrity of game files.
- Restart your computer and relaunch Steam.
- Head over to the library section and right click on the game which is giving you problems.
- Click on its properties and select the local files tab.
- Click the verify integrity of game files button and Steam will verify that game in a few minutes.
Hopefully, after performing the above steps, your Steam won’t give any issue.

ESET NOD32
NOD32 has the tendency to mark some application files as malicious and will most probably quarantine it. This often results in the error while updating a game. Browse to your current Steam directory and copy the address
- The default location for your steam folder should be “C:\Program Files (x86)\Steam”.
Press ⊞ Win + R button. This should pop-up the Run application.
In the dialogue box write “C:\Program Files (x86)\Steam”.

Or if you installed Steam in another directory, you can browse to that directory and you can proceed with steps mentioned below.
After copying the address open ESET NOD32 and paste the location in exclude from real time scanning.
Follow the ‘verify integrity of game files’ method listed above and you will be all good.

Kaspersky AV
Kaspersky may sometimes flag Steam as an intruder and disable it from making any changes to the hard drive. To fix this, head over to ‘threats and exclusions’. Navigate to ‘trusted zone’ and add Steam.exe as a trusted application. Remember to change the settings to Do not restrict application activity as well as Do not scan opened files.
Follow the ‘verify integrity of game files’ method listed above and restart your computer.

Windows Defender
- Click Windows button and in the search bar type “Windows defender”. Among all the options, there will be an application named “Windows Defender Security Center”. Open it.
- Upon opening, you will find a list of options available in the new window. Select the option “Virus and threat protection”.

- Upon entering the menu, navigate to Virus and Threat Protection Settings. Windows may prompt you to allow administrator access to use this feature. If so, press Yes.

- After entering the required menu, you should search the window which says “Add or remove exclusions”. Click it and you will be navigated to a menu where you can add exclusions. You can exclude folders, extensions, and even files. In this case, we will exclude the whole Steam folder which is located in the directory you downloaded it.

- Click on the option which says “Exclude a folder” and navigate to your Steam directory. The default location for your steam folder should be “C:\Program Files (x86)\Steam”. Once you reach the location select the folder and save changes.
- Restart your computer and run Steam with administrative privileges. Hopefully, your speed issue will be resolved.
Solution 10: Downloading Latest Steam Client
- The default location for your steam folder should be “C:\Program Files (x86)\Steam”.
Press ⊞ Win + R button. This should pop-up the Run application.
In the dialogue box write “C:\Program Files (x86)\Steam”.

Or if you installed Steam in another directory, you can browse to that directory and you can proceed with steps mentioned below.
- Locate the following folders:
Steam.exe (Application)SteamApps (Folder)Userdata (Folder)
- Delete all the other files/folders/applications except the ones mentioned above.
- Head over to the Steam website and download the latest Steam client. Don’t launch the old Steam.exe present in your directory at all. The problem won’t be solved.
- Install Steam using the installer in the same directory as your previous one. Hopefully, after installation, the problem will be solved.
Solution 11: Changing Default Browser
In a weird turn of events, having Chrome or any other browser set as the default browser sometimes causes issues with the download request that Steam sends to its servers. Therefore, in this step, we will be setting internet explorer as our default browser temporarily to make sure that the download proceeds. For that:
- Press “Windows’ + “I” to open settings.
- In settings, click on “Apps” and then select “Default Apps” from the left pane.

- Click on the “Web browser” option and then select “Internet Explorer” from the list.
- Open Steam and check to see if the issue persists.

Solution 12: Removing Steam Content Server Limiter
In certain cases, it was shown that uninstalling Steam Content Server Limiter from the Classical Control Panel interface fixes this issue for a lot of people. Therefore, in this step, we will be doing exactly that. For that:
- Press “Windows’ + “R” to open the Run prompt.
- Type in “Control” and press “Enter”.

- Click on the “Uninstalla Program” option and then right-click on the “Steam Content Server Limiter” and select “Uninstall”.
- After the server limiter is uninstalled, check to see if the issue persists.

Method 13: Changing DNS
In certain situations, the server DNS that the computer is using to communicate with the internet might not be compatible either with the steam servers or it might be facing issues temporarily. Therefore, in this step, we will be changing our DNS servers. For that;
- Press “Windows’ + “R” to open the Run prompt.
- Type in “ncpa.cpl” and press “enter”.
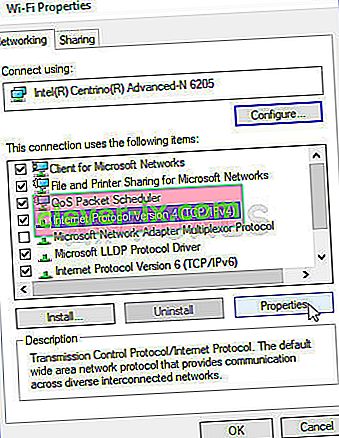
- Right-click on your network adapter and select “Properties”.
- In properties, double click on the “Internet Protocol Version 4(TCP/IPV4)” option and check the “Use following DNS Addresses” option.
- Type in “8.8.8.8” in the primary DNS address and “8.8.4.4” in the secondary DNS address.
- Click on “OK” and then check to see if the issue persists. If it does, try using “1.1.1.1” and “1.0.0.1” in the fields respectively.


Method 14: Changing Config File
In certain situations, the config file on the computer might require some editing in order to get it some games to start working. The steps listed below are primarily for Mac but you can try them on some older OS such as Windows XP too as some users reported that this fixed it for them.
- Open the Mac Finder and navigate to the following directory.
drive_c/Program Files/Steam/config/
- Launch the “config.vdf” file and wait for it to open.
- Find the following text lines inside the file.
"InstallConfigStore" { "Software" { "Valve" { "Steam" "cip" - Paste the following lines of code under the “cip” entry in the config after creating a new line under it.
CS" "valve511.steamcontent.com;valve501.steamcontent.com;valve517.steamcontent.com;valve557.steamcontent.com;valve513.steamcontent.com;valve535.steamcontent.com;valve546.steamcontent.com;valve538.steamcontent.com;valve536.steamcontent.com;valve530.steamcontent.com;valve559.steamcontent.com;valve545.steamcontent.com;valve518.steamcontent.com;valve548.steamcontent.com;valve555.steamcontent.com;valve556.steamcontent.com;valve506.steamcontent.com;valve544.steamcontent.com;valve525.steamcontent.com;valve567.steamcontent.com;valve521.steamcontent.com;valve510.steamcontent.com;valve542.steamcontent.com;valve519.steamcontent.com;valve526.steamcontent.com;valve504.steamcontent.com;valve500.steamcontent.com;valve554.steamcontent.com;valve562.steamcontent.com;valve524.steamcontent.com;valve502.steamcontent.com;valve505.steamcontent.com;valve547.steamcontent.com;valve560.steamcontent.com;valve503.steamcontent.com;valve507.steamcontent.com;valve553.steamcontent.com;valve520.steamcontent.com;valve550.steamcontent.com;valve531.steamcontent.com;valve558.steamcontent.com;valve552.steamcontent.com;valve563.steamcontent.com;valve540.steamcontent.com;valve541.steamcontent.com;valve537.steamcontent.com;valve528.steamcontent.com;valve523.steamcontent.com;valve512.steamcontent.com;valve532.steamcontent.com;valve561.steamcontent.com;valve549.steamcontent.com;valve522.steamcontent.com;valve514.steamcontent.com;valve551.steamcontent.com;valve564.steamcontent.com;valve543.steamcontent.com;valve565.steamcontent.com;valve529.steamcontent.com;valve539.steamcontent.com;valve566.steamcontent.com;valve165.steamcontent.com;valve959.steamcontent.com;valve164.steamcontent.com;valve1611.steamcontent.com;valve1601.steamcontent.com;valve1617.steamcontent.com;valve1603.steamcontent.com;valve1602.steamcontent.com;valve1610.steamcontent.com;valve1615.steamcontent.com;valve909.steamcontent.com;valve900.steamcontent.com;valve905.steamcontent.com;valve954.steamcontent.com;valve955.steamcontent.com;valve1612.steamcontent.com;valve1607.steamcontent.com;valve1608.steamcontent.com;valve1618.steamcontent.com;valve1619.steamcontent.com;valve1606.steamcontent.com;valve1605.steamcontent.com;valve1609.steamcontent.com;valve907.steamcontent.com;valve901.steamcontent.com;valve902.steamcontent.com;valve1604.steamcontent.com;valve908.steamcontent.com;valve950.steamcontent.com;valve957.steamcontent.com;valve903.steamcontent.com;valve1614.steamcontent.com;valve904.steamcontent.com;valve952.steamcontent.com;valve1616.steamcontent.com;valve1613.steamcontent.com;valve958.steamcontent.com;valve956.steamcontent.com;valve906.steamcontent.com"
- Save your changes and check to see if the issue persists.
Note: Some users reported to fix the issue after having to deleting the CM List IP addresses in the file aswell in addition to pasting this code.


